RemixJS
Web Development
Shopify Hydrogen
Klaviyo Email Subscription Forms with Shopify Headless
In this post we will go over the basics of setting up a Klaviyo email subscription form inside of a headless Shopify site built on Remix, Hydrogen and Oxygen.

Zach White
3 min read
•Jan 18, 2024
When it comes to marketing automation software for e-commerce, there is perhaps no bigger name than Klaviyo.
With the popularity of headless Shopify on the rise again - thanks in big part to Shopify's exciting acquisition of the Remix web framework, which they have since fully integrated into their headless Hydrogen/Oxygen ecosystem - it's safe to assume that many Shopify stores will be looking at how they can integrate Klaviyo into a Shopify Remix/Hydrogen storefront.
Well in this article we're going to explore how to do exactly that 😎
Note: this article leans towards the development side of things, and assumes you already have a Klaviyo account created.
Let's assume you have a cool design for an "Email Subscribe" form on your headless Shopify site, and you want to be sure that users who submit the form:
1. are subscribed to your Klaviyo email marketing
2. end up on a list inside of the List & segments section of your Klaviyo dashboard for easier organization/lead management
First, create a List inside of Klaviyo called "Leads", and make sure to grab the list ID from the list's setting page:
Note: you can name this list anything you want, but for our purposes we're just going to name it "Leads" to keep things simple.
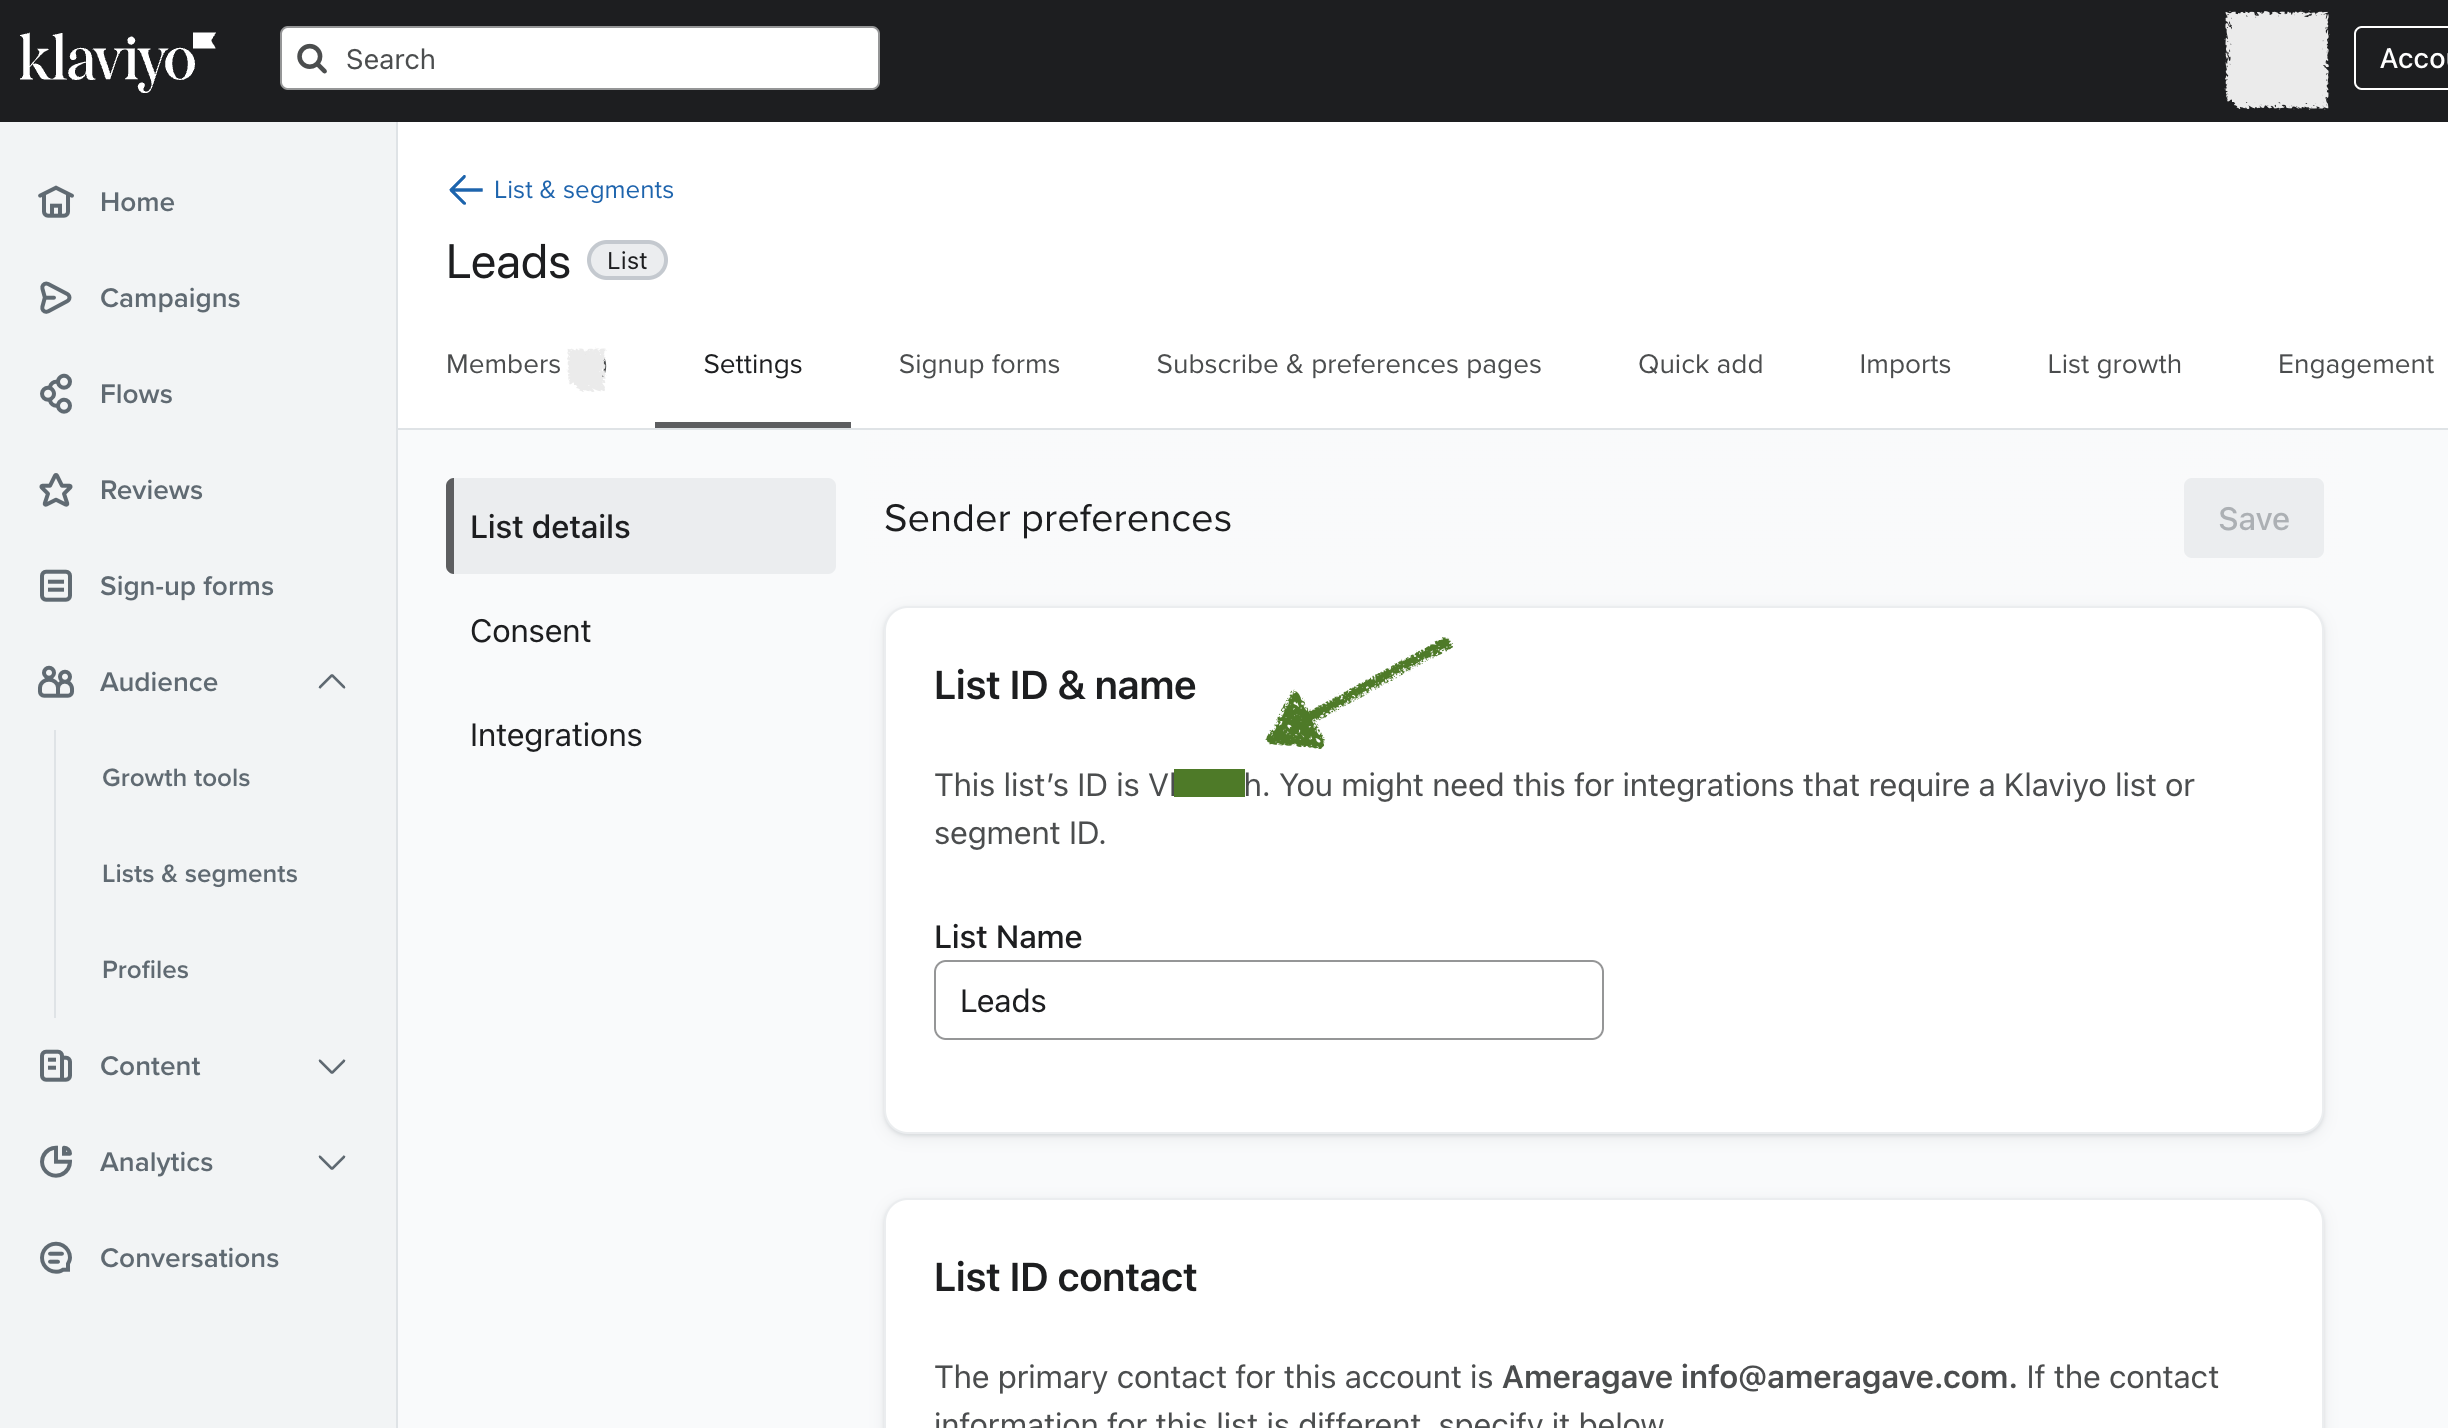
This list ID will most likely be a 6-character alphanumeric string.
Once we have this list ID (along with our Klaviyo API key, which can be found at Settings > Account > API Keys), believe it or not we are now ready to dive right into developing our email subscribe form!
First, let's create a place to store any list IDs we get from Klaviyo:
// app/utilities/constants.tsexport const klaviyoListIds = {LEADS: 'v12345'}
Next, let's create a form using some of Remix's recommended tools:
// app/components/EmailSubscribeForm.tsximport {useFetcher} from '@remix-run/react';import type {action} from '~/routes/klaviyo.submit';import {klaviyoListIds} from '~/utilities/constants';export const EmailSubscribeForm = () => {const fetcher = useFetcher<typeof action>();return (<fetcher.Form method="post" action="/klaviyo/submit"><inputtype="hidden"id="list_id"name="list_id"value={klaviyoListIds.LEADS}/><input type="email" name="email" placeholder="Your email address" /><button type="submit" disabled={fetcher.state === 'loading'}>{fetcher.state === 'idle' ? 'Subscribe' : 'Signing Up...'}</button></fetcher.Form>);};
You'll notice we're making use of useFetcher, which is going to help this form interact with our server.
We're also being sneaky and creating a hidden input field that contains our Klaviyo list ID. This will come in handy in a second.
You might be wondering about the action of our form: "/klaviyo/submit"
This tells the form to send submissions to a resource route at /klaviyo/submit, which we will create now:
// app/routes/klaviyo.submit.tsimport {json,redirect,type ActionFunctionArgs,type LoaderFunctionArgs,} from '@shopify/remix-oxygen';// 404 page if user tries to access this route directly in browser:export const loader = async ({request}: LoaderFunctionArgs) => {if (request.method === 'GET') {return redirect('/404');}};export const action = async ({request, context}: ActionFunctionArgs) => {// return if not POST requestif (request.method !== 'POST') {return json({error: 'Invalid request method.'});}// List ID from Klaviyo dashboard:const formData = await request.formData();const email = formData.get('email');const listId = formData.get('list_id');const attributes: any = {email,};const profiles: any = {data: [{type: 'profile',attributes,},],};const emailSubObj = {// attach to subscribe users to email messagesemail: {marketing: {consent: 'SUBSCRIBED',},},};try {const response = await fetch('https://a.klaviyo.com/api/profile-subscription-bulk-create-jobs/',{method: 'POST',headers: {accept: 'application/json',revision: '2023-10-15','content-type': 'application/json',// @ts-ignoreAuthorization: `Klaviyo-API-Key ${context.env.KLAVIYO_PRIVATE_KEY}`,},body: JSON.stringify({data: {type: 'profile-subscription-bulk-create-job',attributes: {profiles,},relationships: {list: {data: {type: 'list',id: listId,},},},},}),},);// Klaviyo response body empty when successful - use response.status (not response.json):const res = await response;if (res.status >= 200 && res.status < 300) {return json({success: 'Successfully submitted to Klaviyo.'});} else {return json({error: 'Failed to submit to Klaviyo.'});}} catch (error) {console.error('Klaviyo API error:', error);return json({error: 'Failed to submit to Klaviyo.'});}};
So it might seem like there's a lot going on here, but basically all we've done is created a Remix resource route (a route which contains no pieces of UI - it exists only to send/receive server responses) which receives the form data, and uses Klaviyo's API to then add them to our "Leads" list, while also subscribing them to email marketing.
And that's pretty much it! Yes, there are a couple of finer details involved, but I'll leave it to the developer to figure them out from glancing at the code above.
Keep in mind: Klaviyo has a great API and there are a number of different ways to interact with it. When in doubt, you can always check them out again here.
Good luck! And don't be afraid to reach out to us at Good Alchemy for any kind of help with headless Klaviyo integrations 😎